Streamlining Quantity Take Off with CAD Reader
Automated Categorization and Tabulation of Measurement Data in CAD Reader with Seamless Excel Export Integration
Quantity surveyors, engineers, and construction specialists often find it challenging to perform quantity take-offs on 2D CAD drawings in AutoCAD and other CAD software. One common issue is that measurement data such as lengths, areas, and quantities are not automatically categorized and tabulated, and cannot be easily exported to Excel for further process Bill of Quantity. Most of the CAD software available on markets do not summarize all the measurements data carry out on the 2D cad drawing.+
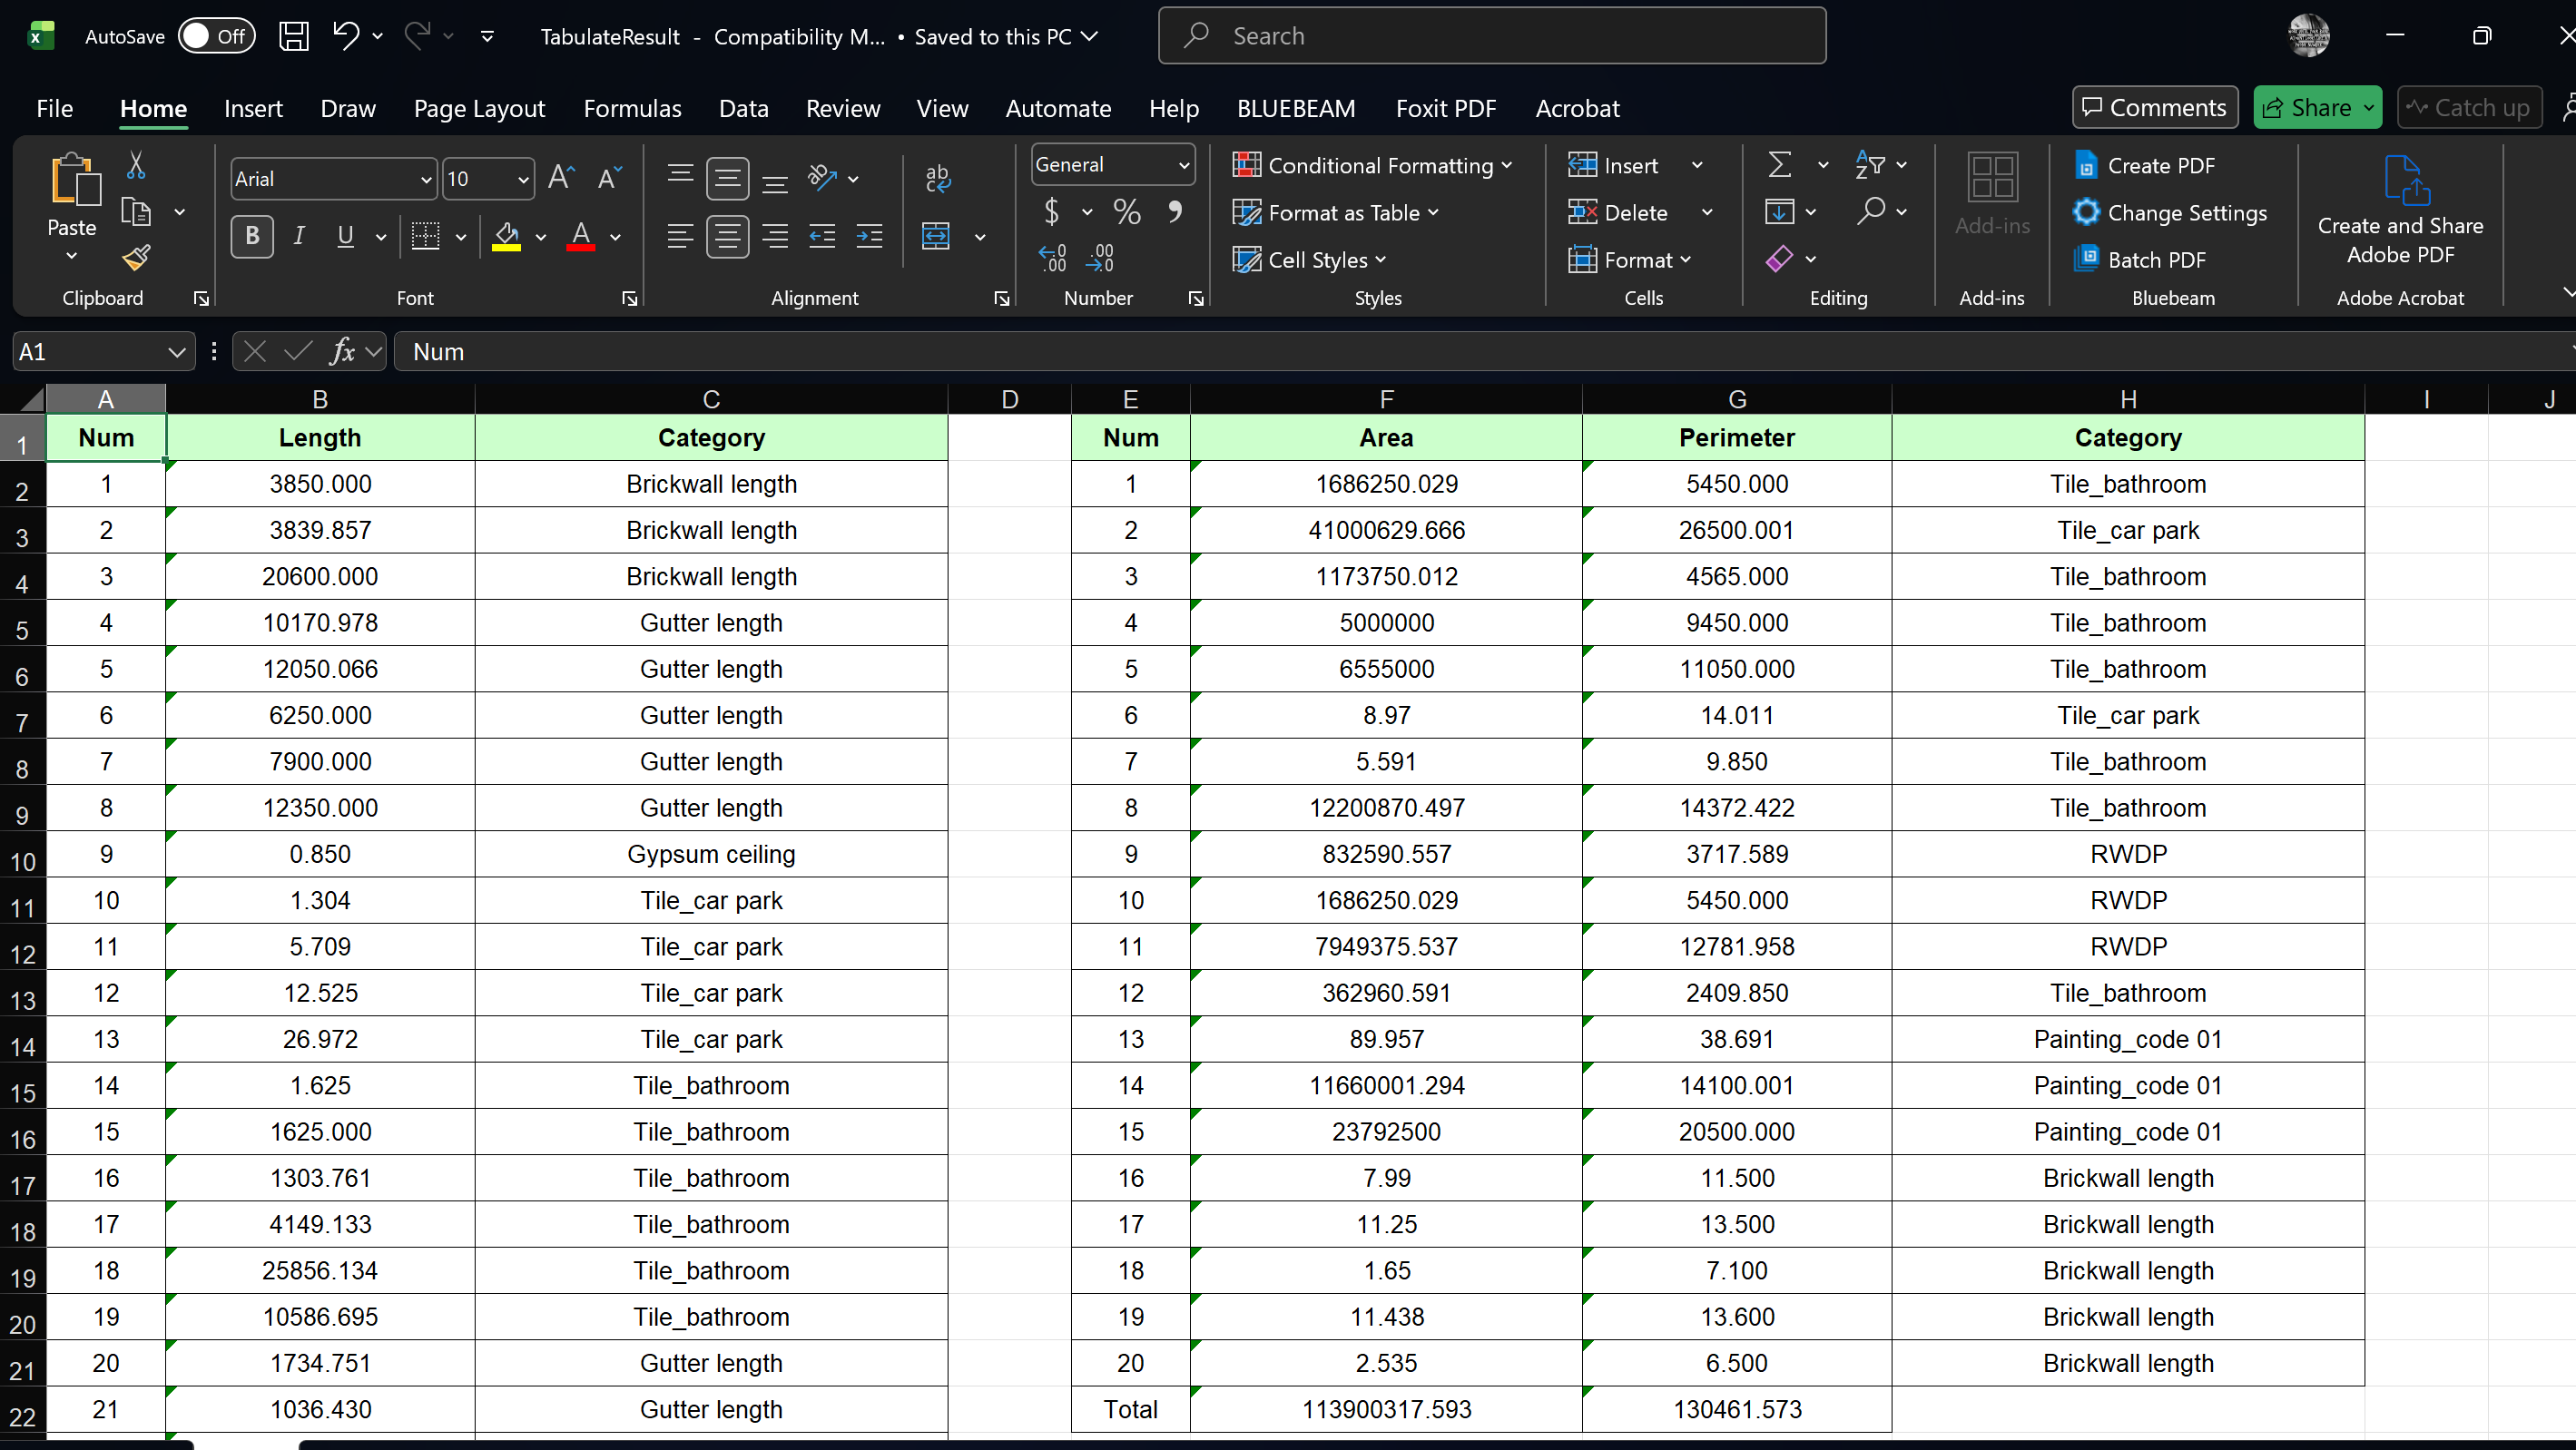
CAD Reader addresses this pain point by introducing it’s most unique feature comment category and tabulation which allow user to taking off easily without the needs to manually transfer all measured data. All measurements taken from the drawing, whether it's length, area, or unit quantity, are automatically organized and can be exported directly to Excel, streamlining the workflow and saving valuable time.
Step-by-Step Guide:
1. Download the latest CAD Reader version for Windows: https://dwg.fastcadreader.com, then launch the software
2. Subscribe to VIP membership to unlock the ‘Tabulate’ feature: https://club.fastcadreader.com/question/detail/286/how-to-upgrade-to-vip-membership-in-cad-reader
(VIP membership works across Windows, macOS, iOS, and Android.)
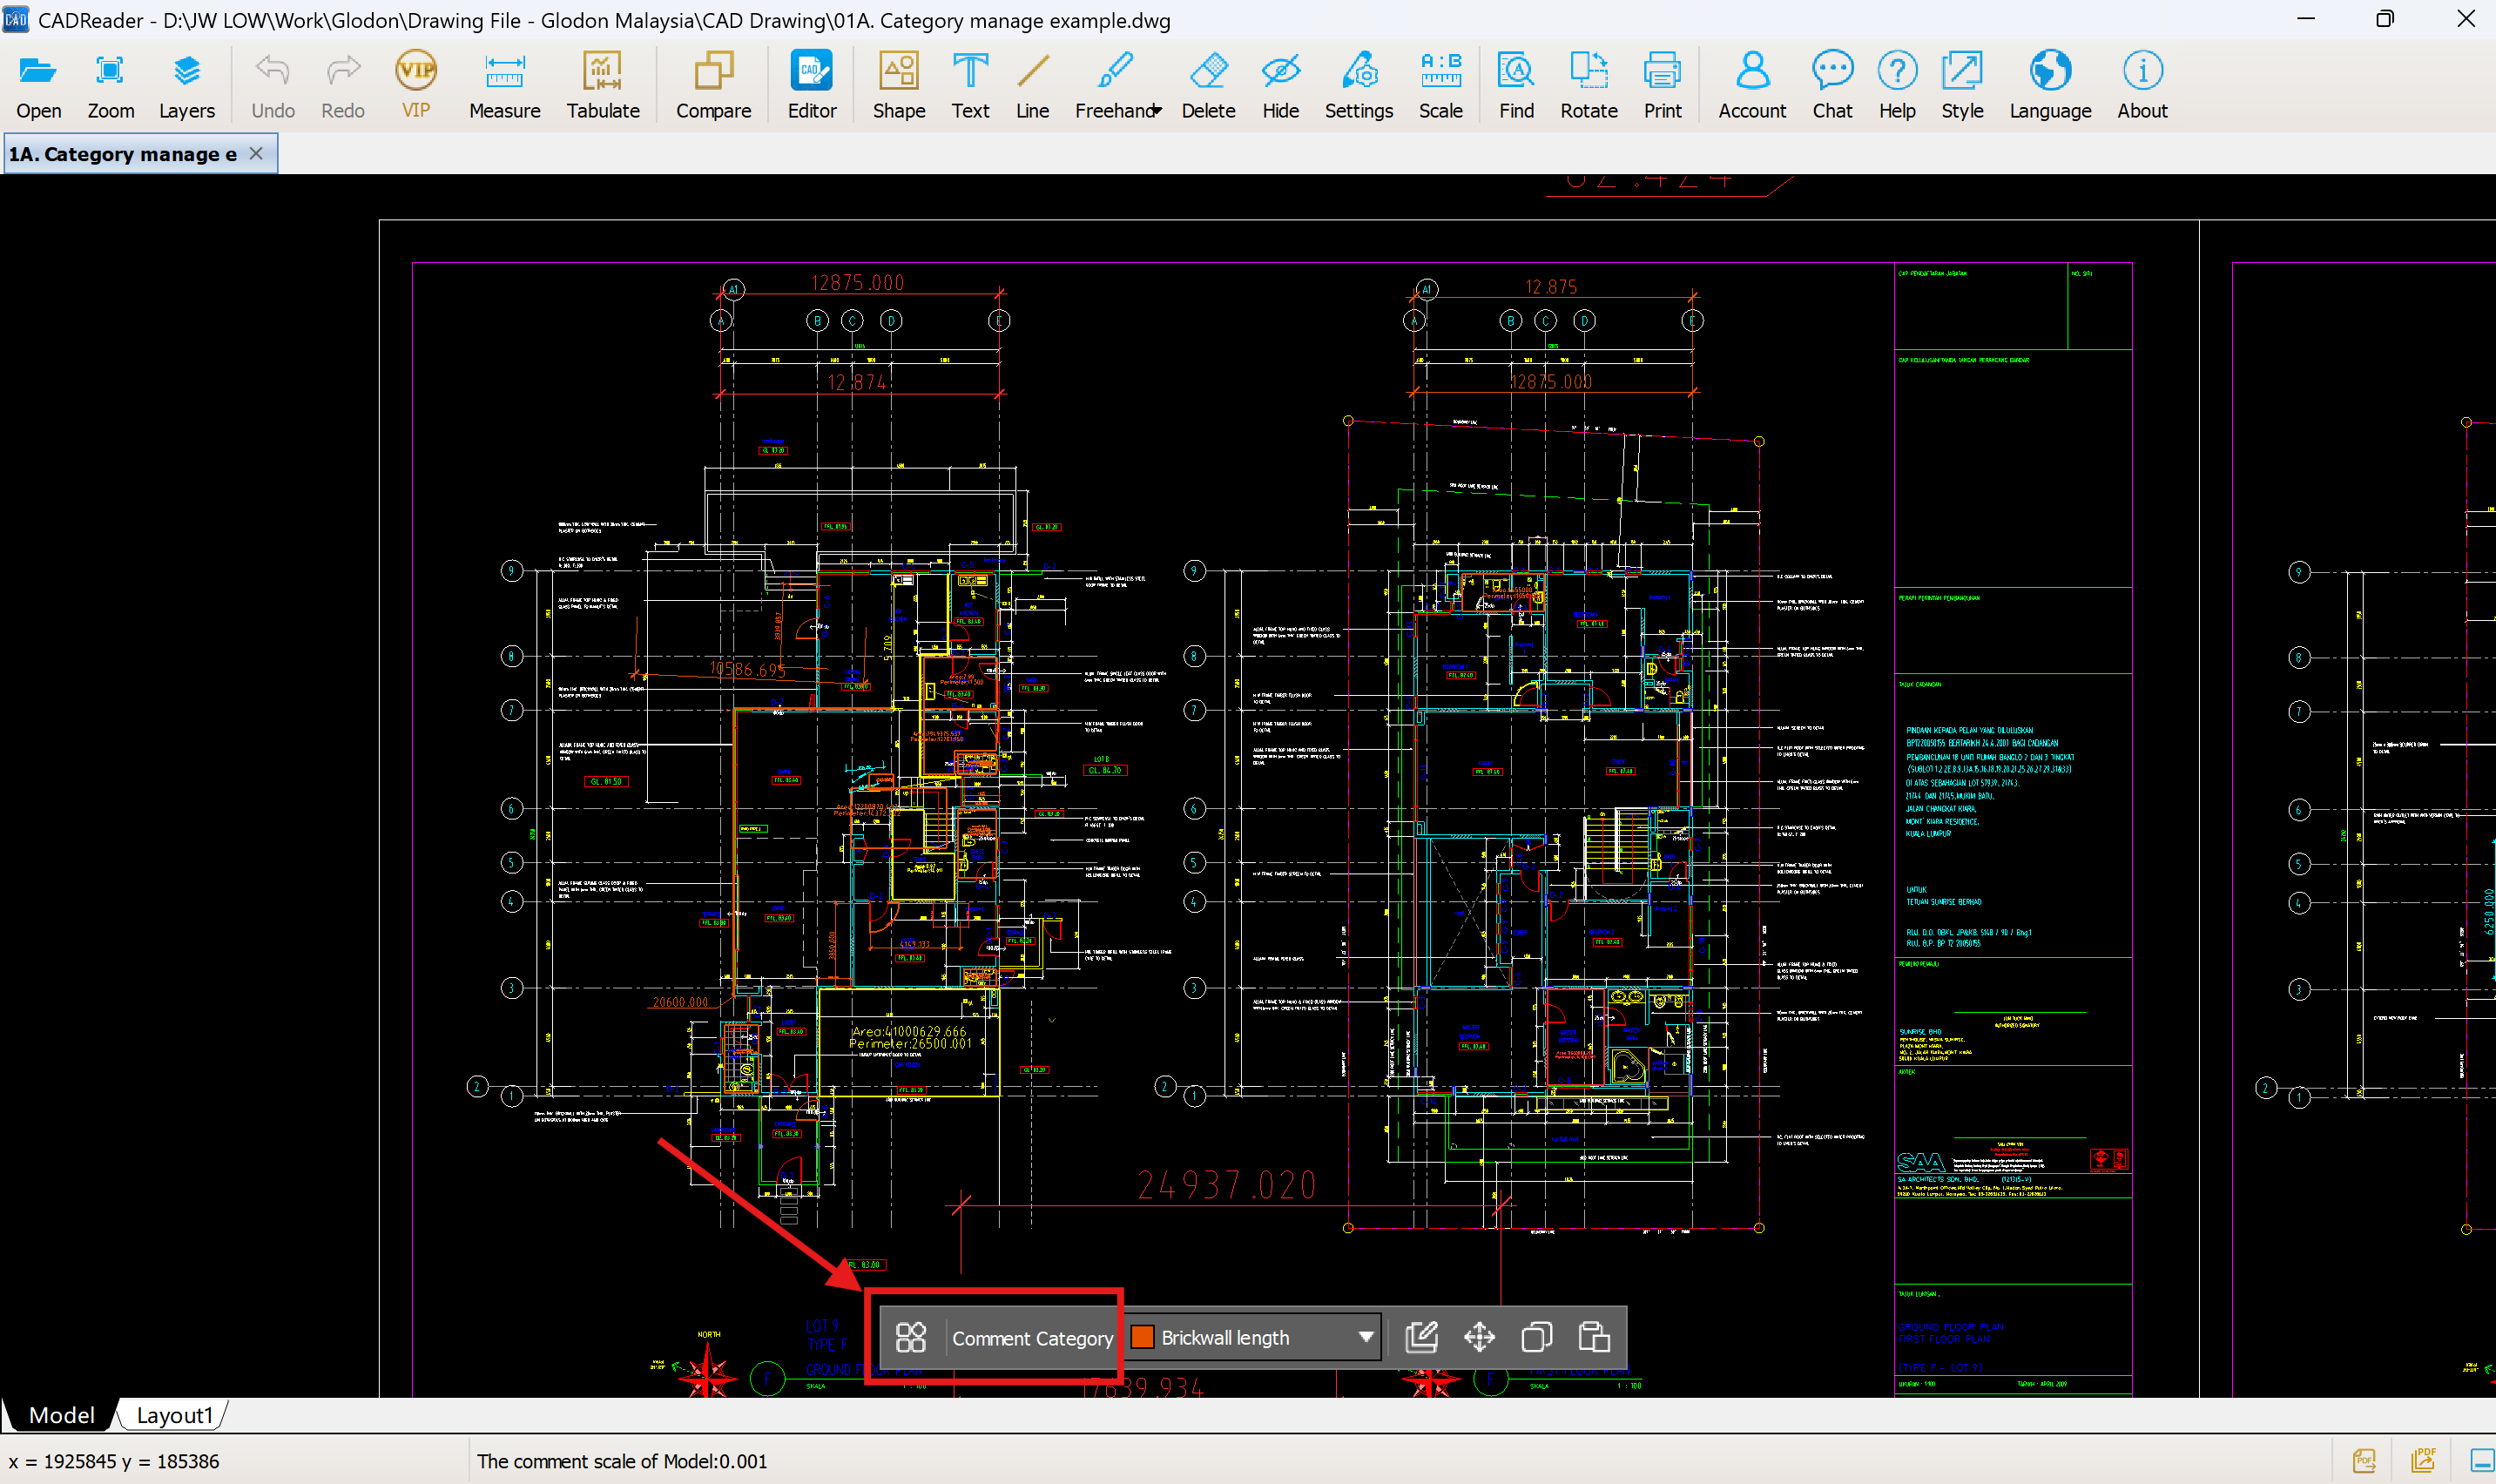
3. Click on the ‘Comment Category’ function located at the bottom of your screen
4. Select ‘Add Category’ and assign a specific name and colour to each category.
Examples include:
Tile for bathroom
Tile for car porch
Cold water pipe (20mm diameter)
Sanitary pipe (50mm diameter)
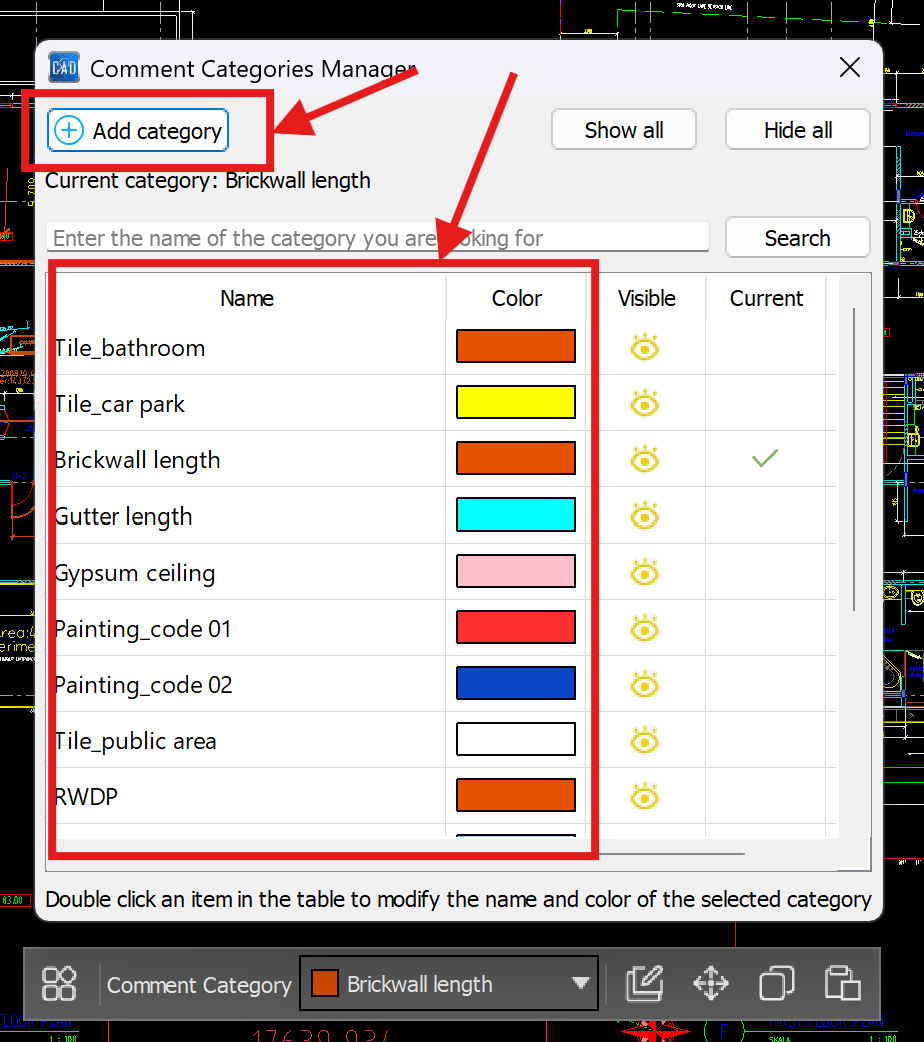
5. Close the Comment Category Manager when finished
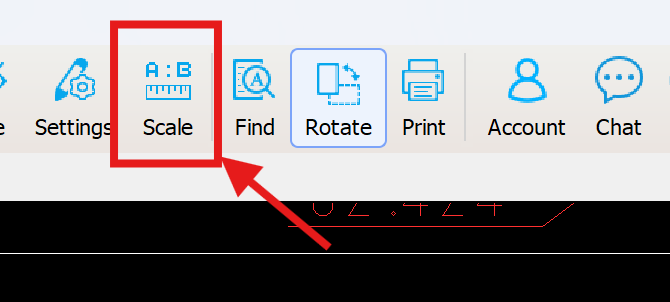
6. Before measuring, use the ‘Scale’ tool in the toolbar to confirm units are correct. Refer to this guide: https://club.fastcadreader.com/question/detail/464/how-to-convert-the-measurement-scale-in-cad-reader.
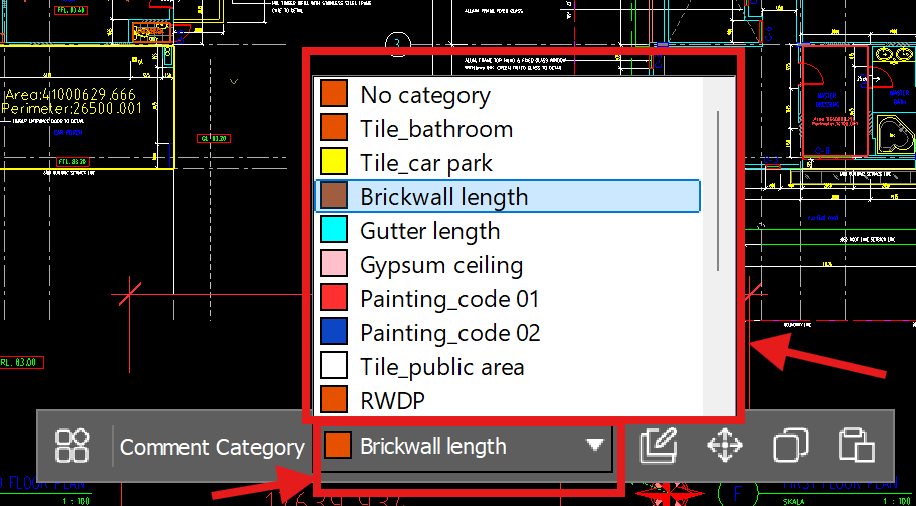
7. Switch categories using the Category Toolbar before each measurement. Always change categories when measuring a new object or material to ensure accurate tabulation
8. Begin your quantity take-off using the available measurement tools in the toolbar.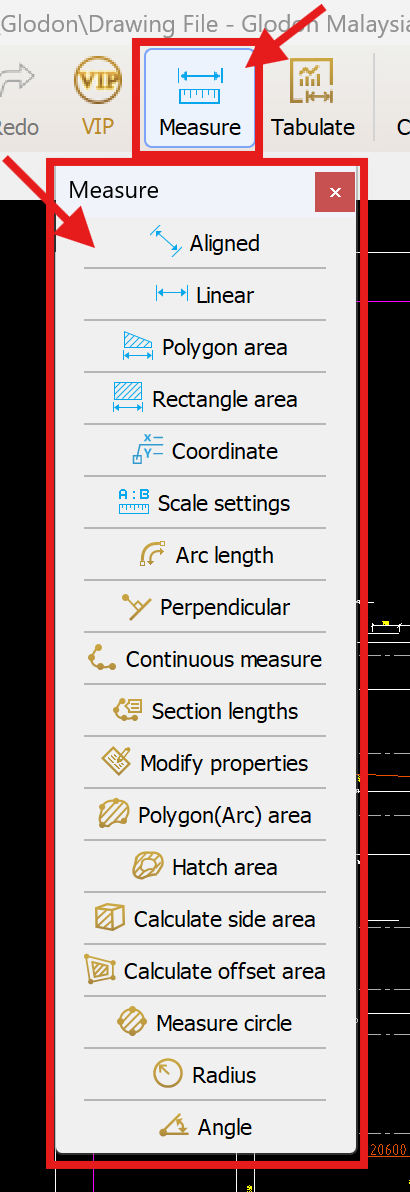
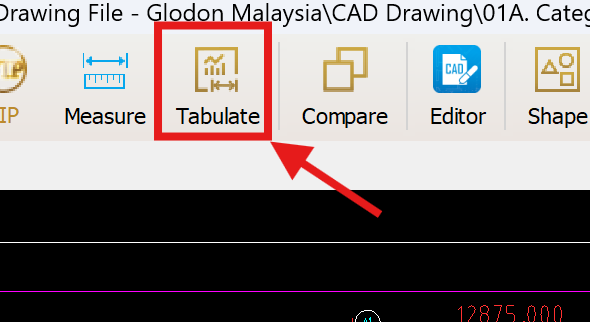
9. Once all measurements are complete, click on the ‘Tabulate’ function in the toolbar.
10. The software will automatically tabulate categorized data (length, perimeter, area).
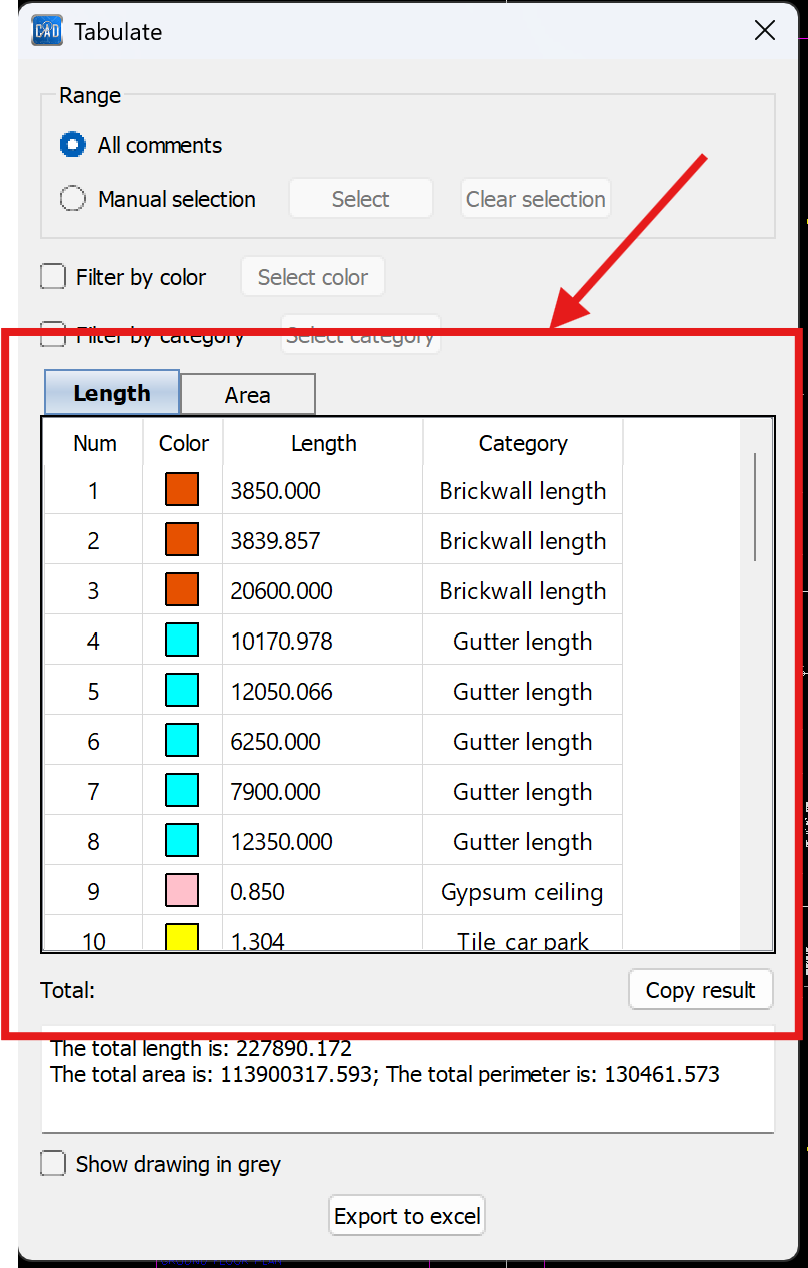
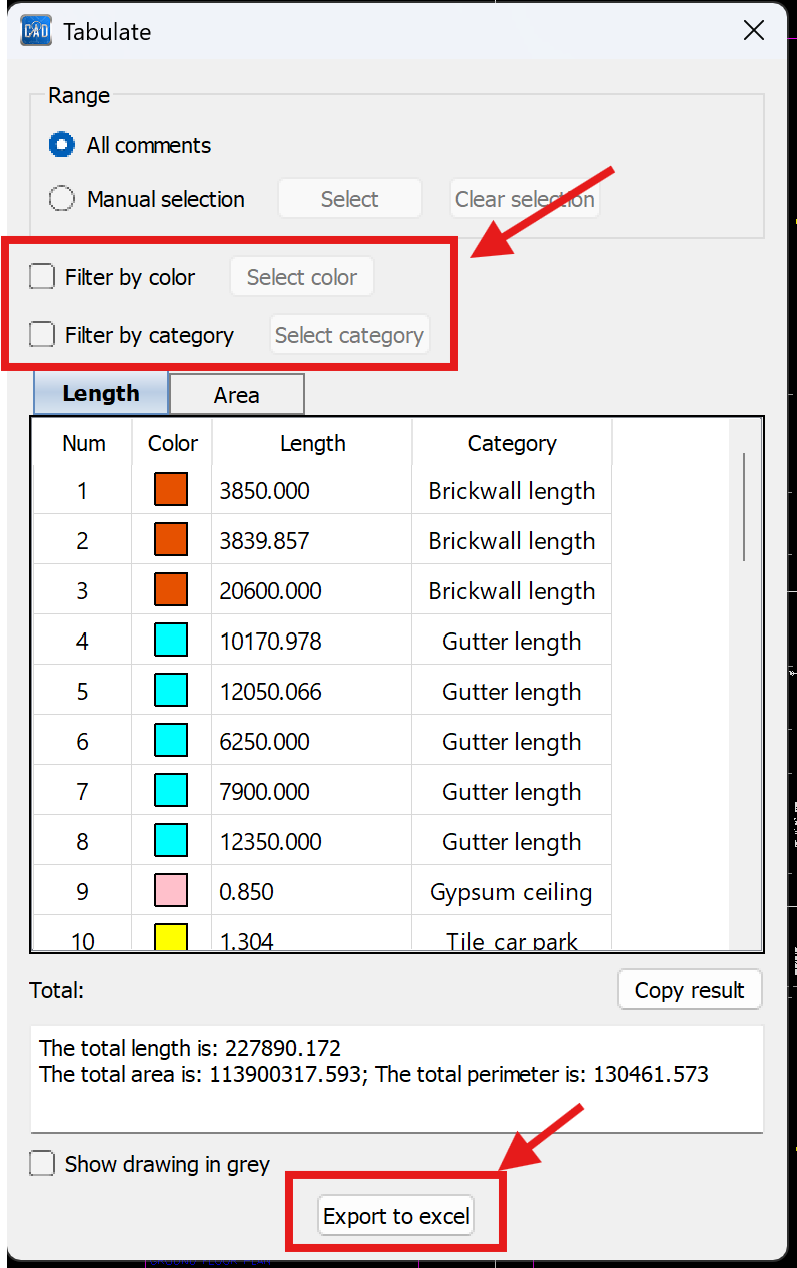
11. Use the filter function to refine the results, then click ‘Export to Excel’ for further processing or reporting.


I don't fully understand your question, can you please contact us on our customer support team via WhatsApp at +60 16-740 2995. Kindly share the example video or any sample on whatsapp so that we can look into this issue.